Here’s how to rebuild brake calipers on a motorcycle
Instructions for restoring the former power brakes motorcycle
Twenty-five years, two and a half decades, a quarter of a century is for many years. Especially for a lot of equipment, in particular, incredibly much for the motorcycles and too much for their brake system.
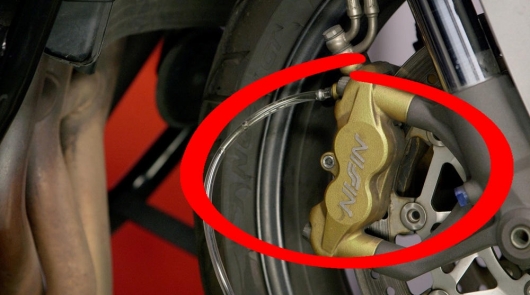
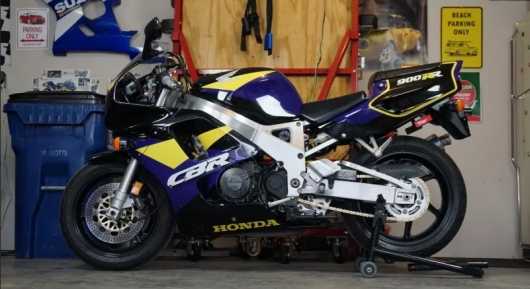
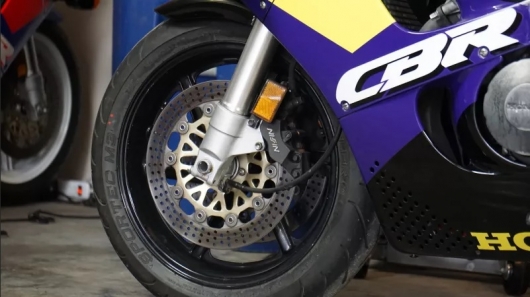
In our new useful review about motorcycles as an example, will use the brake system of the old, but proven horse – Honda CBR900RR. The hand mechanics are not touched inside this node since 1994, i.e. since the production of motorcycle, so check the condition of the item, and to replace worn-out parts of the caliper, or motorcycle – the downhillers, it is desirable and even necessary. All the same brakes – this is one of the most important components of the motorcycle, because it is responsible for security.*
*Due to the fact that the brakes are very important and responsibly, we recommend that you contact the specialized service, where professionals with years of experience will make the bulkhead quickly and efficiently. Otherwise, if you are inexperience a mistake at a crucial moment it can cost you your life. Keep this in mind! Therefore, all the information you will read below, is for informational purposes only. Repairs carried out by a professional using specialized tools. So read on and dive deeper into the fascinating world of motorcycles without unnecessary in this case and frankly dangerous initiative.
Video taken from YouTube channel: a Practical Enthusiast
The process of restoring the brake calipers may seem complicated, but it is actually not as difficult as at first glance. “Let’s see what it takes,” says the author of the video tutorial which thoroughly examines all the nuances of repair of the calipers.
Dismantling of the brake mechanism
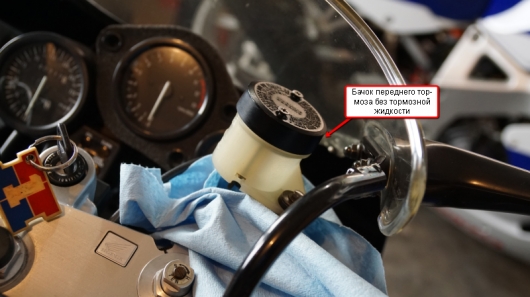
“Before you begin to disassembly the brake system, I had to remove from the system as much as possible brake liquid,” says the master. This suits well the usual kitchen Spasovka, which can be used to pump fluid from the surge brake master cylinder reservoir by moving the surplus in a pre-prepared spare container.
“I made sure to drop the brake fluid did not get on painted surfaces or on the skin is a toxic liquid” (take note). Indeed, DOT is very caustic stuff.
For example, the class “tomosuke” DOT 4 has a boric acid, a weak solution, but it is there, and for the skin it’s not the most useful thing.
Once most of the liquid is removed from the system, it’s time to move down to the caliper and start working with it.
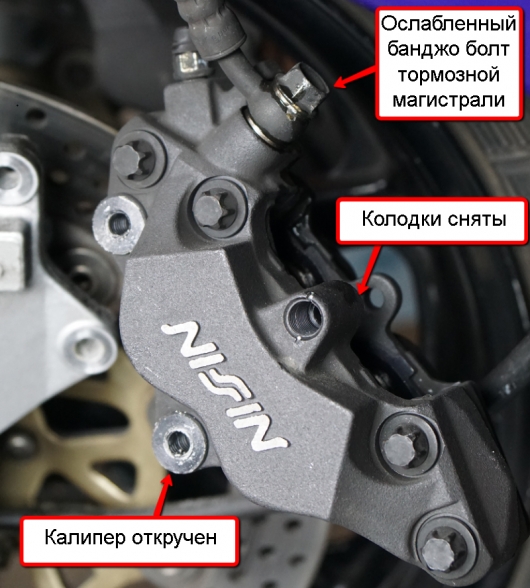
“First, I unscrewed the banjo bolt hose, securing it to the caliper. The work was carried out without disconnecting the downhillers with a fork, because the banjo bolt is very tightly fixed and to do the operation for disconnection better in fixed position caliper on the bike. But even with this little trick bolt stubbornly resisted…”.
Tip: Sliding the threaded bolt, do not rush to turn out immediately, otherwise it will fill all the remaining brake fluid from the hydraulic lines.
After that the caliper was removed from the legs of the fork, and removed from the brake disc. Then he removed the brake pads and body parts.
“As soon as the caliper was in hand, I started to Unscrew the bolt completely. I put a pan under the caliper to drain the remaining brake fluid system, which is a small trickle began to flow from the brake line. As soon as the hydraulic hose was released from the liquid, I turned the caliper upside down over drain pan to drain the remaining fluid from the caliper”.
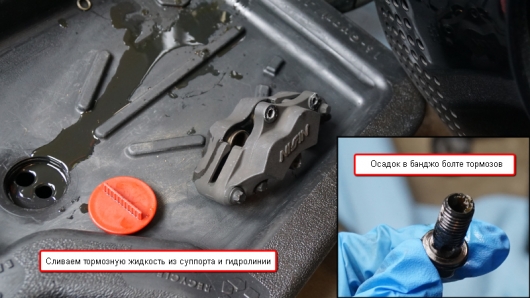
Even at this early stage of the disassembly process already became visible that the inside brake cars, there are signs of serious corrosion. Just look at the inside of the banjo bolt. See this RAID? It is the decay products of the metal.
Removed the caliper on this bike made of two parts, so the next stage of the showdown consists of disconnecting the case halves held together with bolts (4 pieces).
“After removing the bolts, I tore the caliper apart. One part of the downhillers, for lack of a better term describing it, call it “Executive” side, which is like the brake line, it initially enters the brake fluid.
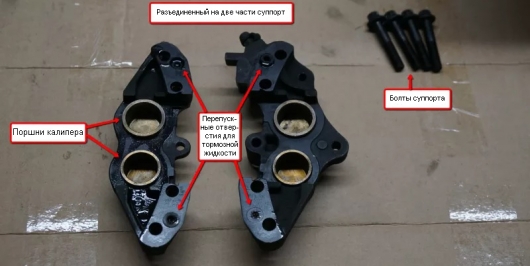
Further, the fluid pressure is transmitted to the other side of the downhillers through 2 holes of a small section in the upper and lower parts brake cars. It is critical that these holes are clean and not clogged with dirt, solid particle decay. Otherwise, the fluid pressure will not be transmitted to the second side of the brake pistons do not work and pressing the pads will not occur simultaneously with equal power from both sides of the brake disc”.
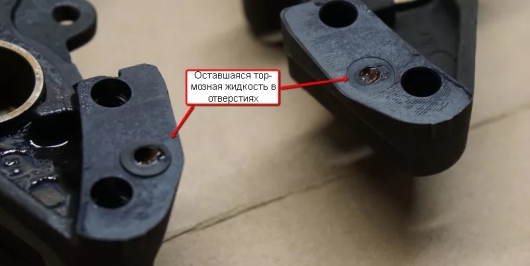
In our case, these by-pass openings were tightly Packed with dirt. Why was it in there? The reasons are different, but a preventive measure that will not allow dirt to accumulate one: replace brake fluid in accordance with the technical regulations of motorcycle maintenance. Yes, it needs to be changed!
“No wonder why the brakes on this bike felt soft, with such a large amount of dirt in the bypass holes, only half of the pistons in the caliper worked right.”
The next step in the process of dismantling and subsequent adjustment where things really get messy, – extract the piston from the holes in the caliper.
“There are a number of methods of extraction of caliper pistons, but the easiest I found is the use of compressed air” – shares his experience of the master.
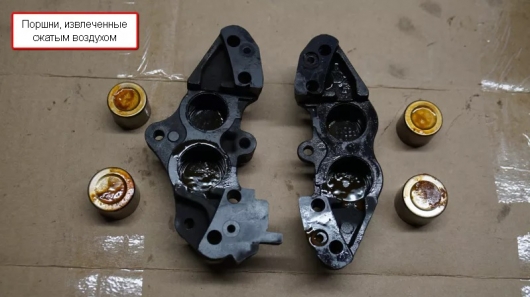
“I sent compressed air through the above-mentioned by-pass openings for the brake fluid to “pull” the pistons out of the holes in the caliper. You have to be careful with the use of compressed air: too much air will beat out the pistons with such force that they corks from bottles of champagne.” Precautions: do not place face directly in front of the extractable piston caliper and make sure you use eye protection (construction points) to just do themselves not damage delicate work.
“Also, keep the holes of the halves of the downhillers directed into something soft that could absorb the energy of the flying piston” – said the American. But we have a better suggestion: wrap the fabric around the halves of the caliper, not very tight, that the piston was where to go. Once it’s out, the fabric will stretch and stop his flight, without damaging the piston on a hard surface. Only, beware of brake fluid – it will fly in all directions. Better dressed in overalls made of thick fabric, you do not mind and which will not allow brake fluid to get to your skin.
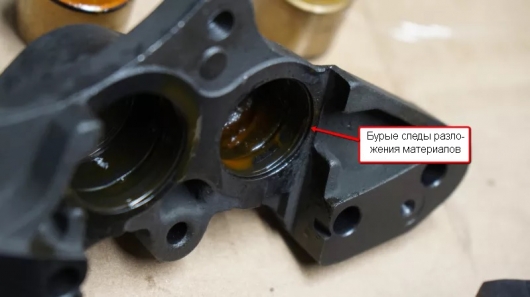
With extracted piston, you can see the true condition of the insides of the caliper. Please note this orange, rusty, “Il” is what you can see if your brakes are not serviced for many years. This nasty abrasive significantly degrade the quality of the brakes and begin to wear as the pistons themselves and their seats, ultimately leading to brake system failure. Sooner or later.
The brake Assembly
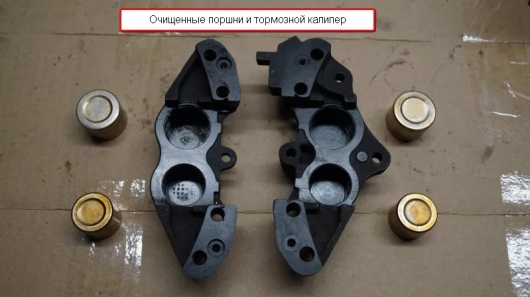
“Taking stock of technical wipes and a can of cleaner for brake parts, I went into the fresh air to clean filled with brake fluid elements: parts of the caliper and pistons. After a difficult 15 minutes all the elements of monocontractor was cleaned to a squeaky Shine. When the parts dried, I was relieved to find that the pistons and in the holes of the caliper there was no trace of pitting or pitting. If that happened, it probably would have required replacement of these components.”
After it was removed the orange slime, it’s time to remove the old piston seals: the seals and dust caps, which are located inside the holes of the downhillers.
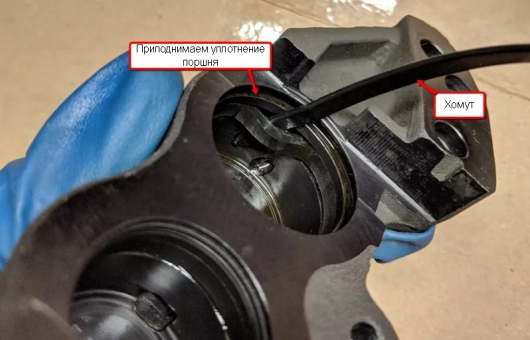
It is critical to mechanical intervention has not led to damage to the walls of the hole while removing them from the old rubber bands. This requires the use of tools from materials that are softer than the metal of the caliper. For example, for this delicate work you can use a plastic clamp.
When the old seals and dust caps removed, the time comes to install a new one. Here can be not so simple. Of course, you tell the online search query of type “Honda CBR900RR repair kit for brake”, but instant results do not expect it to happen immediately and in one place. Most likely, you have to look at the manual and directory part numbers for the repair of the caliper of the motorcycle by purchasing them in different places.
In the example of an American full kit was found on eBay for $30 (about 1.800 rubles).
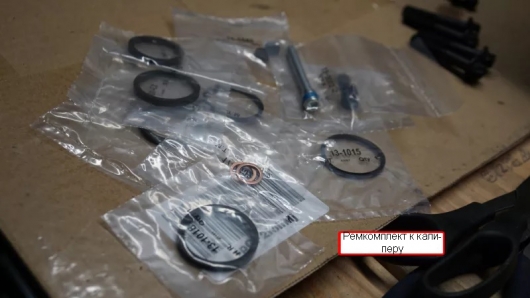
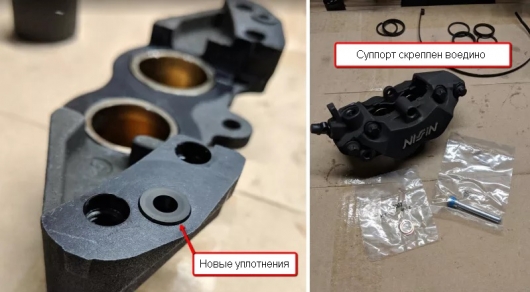
The set was:
New seals;
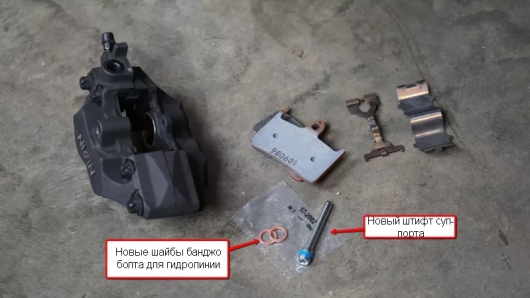
New guide calipers;
New copper sealing washers for the brake hose banjo bolt.
And a lot of detail. That is, in other words, all that was needed to repair the downhillers.
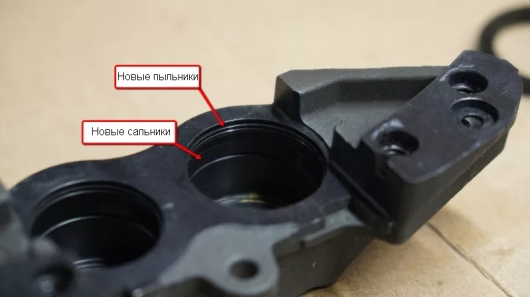
New seals in place in the grooves fresh and natertye.
Then it’s time to get cleaned brake pistons back into the caliper. Before you do this, you should apply a light coat of fresh brake fluid on the outer surface of the pistons. This will allow the pistons to slide on the seals, don’t hush them.
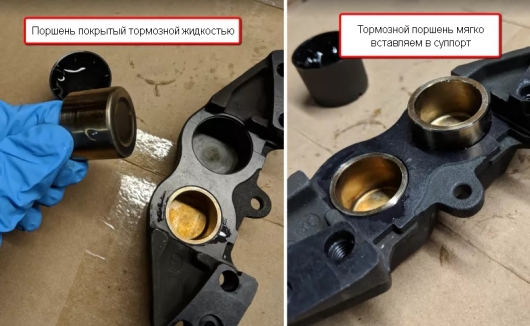
Remember that, installing the pistons, you need to be extremely careful. Ensure that the pistons were without bias. Even if damage to the new seals, it may cause leakage of brake fluid through the seals.
Now, when the pistons were put back into place in the caliper, install the new seal by-pass holes (remember, those who are responsible for the flow of brake fluid to another part of the brake cars?), and then again to seal half of the caliper bolts.
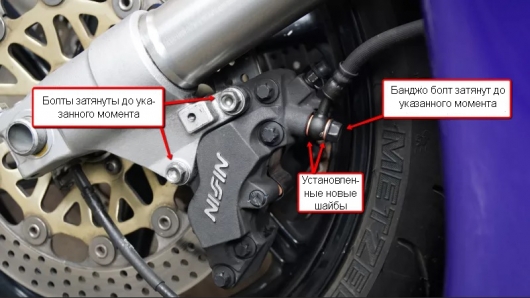
“The bolts tightened with the effort, spelled out in the requirements to repair the motorcycle were the final part of a larger work on the Assembly. Left detail: install the brake pad spring fixing brake pads, the caliper was not on the motorcycle.”

Then the caliper can be installed back on the fork, tightening the bolts with a force in accordance with the specifications. Next is installing the brake lines. Was put new copper washers on both sides of the fitting brake line, and the banjo bolt was tightened with the correct specification effort.
Since the brake system was completely drained of liquid, you can fill it and let the air out. We won’t go into the details of how to bleed the brake system of motorbike, good instructions can be found with a quick Google search.
“I found a method called “reverse pumping” is perfect for this job. This method will allow you to pump brake fluid from the caliper to the master cylinder, which will mean that all air will be ejected through the reservoir with brake fluid” – sums up mechanic.
Pumping the brakes can take some time so please be patient. In the end, you will receive the elastic brake lever, fully updated brake system and again feel confidence in the abilities of the brakes of your motorcycle.

Old parts
The cost of work – less than $60, or approximately 3,700 rubles at the current rate. Not bad for such an important update!
Sometimesiamanasshole знатьЗаконодательствоТехосмотрЛайфхак
Knowledge base